Data Orchestration: Dagster with Google Drive Api


I have tried to recreate the crash course in my own way here. If you read through the documents, you will understand how to use dagster in 2023, June.
First of all, we need to create a virtual environment. It is optional but it is highly recommended. I use conda.
conda create --name serverless_project
conda activate serverless_project
Name of my environment is serverless project. Why? I don’t know. Don’t worry about it.
Let’s go into a local repository where we want to scaffold our dagster project. Scaffold means a structure around a building that supports masons to continue to work. So, by scaffolding, we mean that we would be setting up a structure for the dagster codes.
I am going into this following repository. Then I will install Dagster.
cd E:\\python\\orchestration\\dagster
pip install dagster
dagster project scaffold --name gdriveviz
cd gdriveviz
Now, we need to install a lot of the dependencies of the dagster.
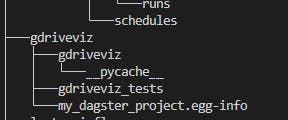
Open up the project in the vscode. Open the setup.py file from the scaffolded thisnewproject2 repository. From the bottom right hand side corner, select the conda environment which is, in my case, serverless_project.

You might see some other folders in the screenshot above which you might not have in your repository. Don’t worry about it right now. You will have them too at the end of the project.
In the setup.py file, you need to add python dependencies that we will be using for this project. install_requires variable holds the list of the dependencies required. extras_requires also holds a list of some extra dependencies. For this project, we need some specific dependencies ready in our environment. So, lets, add them here in the code.
at this point we need the most important api installaiton which is google api
#Generally this is how you would install it
#but, this is for the record only
#in this example we will install it though the setup.py
pip install --upgrade google-api-python-client google-auth-httplib2 google-auth-oauthlib
Here is the code for you to copy paste.
from setuptools import find_packages, setup

from setuptools import find_packages, setup

setup(
    name="my_dagster_project",
    packages=find_packages(exclude=["my_dagster_project_tests"]),
    install_requires=[
        "dagster",
        "PyGithub",
        "matplotlib",
        "pandas",
        "nbconvert",
        "nbformat",
        "ipykernel",
        "jupytext",
                "google-api-python-client",
                "google-auth-httplib2",
                "google-auth-oauthlib"
    ],
    extras_require={"dev": ["dagit", "pytest"]},
)
Now, Lets head over to the google cloud console > select a project > api dashboard> enable drive api and create oAuth cliend id. Put the downloaded file in this gdriveviz folder. Rename it to credentials.json. We will talk about it later.
You will see in the gdriveviz folder, there is another folder with the same name, that is where we will see a file named init.py
from dagster import Definitions, load_assets_from_modules, AssetSelection, define_asset_job, ScheduleDefinition, with_resources

from . import assets
import os
from github import Github
from dotenv import load_dotenv
load_dotenv('E:\\python\\airflow\\dagster\\thisnewproject\\thisnewproject\\.env')

all_assets = load_assets_from_modules([assets])

# Define a job that will materialize the assets
drive_api_job = define_asset_job("drive_api_job", selection=AssetSelection.all())

drive_api_schedule = ScheduleDefinition(
    job=drive_api_job,
    cron_schedule = "0 * * * *",
)

defs = Definitions(
    assets=all_assets,
    schedules=[drive_api_schedule],
    resources={"github_api": Github(os.environ.get('GITHUB_ACCESS_TOKEN'))}, #github_api variable declaration.. all resources belongs to 'context'
)
If you notice in the last line of our code,
resources={"github_api": Github(os.environ.get('GITHUB_ACCESS_TOKEN'))}, #github_api variable declaration.. all resources belongs to 'context'
Here the github_api is a variable. We will treat this as a variable. We get the value of this variable from os.environ.get(’GITHUB_ACCESS_TOKEN').
You can set 'GITHUB_ACCESS_TOKEN' using the following code opening a seperate python shell:
import os

os.environ['GITHUB_ACCESS_TOKEN'] = 'your key from github'
We will first define a job, we will also give the job a name inside a variable which has the same name as the variable.
# Define a job that will materialize the assets
drive_api_job = define_asset_job("drive_api_job", selection=AssetSelection.all())

drive_api_schedule = ScheduleDefinition(
    job=drive_api_job,
    cron_schedule = "0 * * * *",
)
The reason why we put define_asset_job("drive_api_job", selection=AssetSelection.all()) inside a variable called drive_api_job is because define_asset_job() is a function that returns a job object. By assigning the job object to the drive_api_job variable, we can refer to the job later in the code by using the variable name instead of calling the define_asset_job() function again.
So, when we define drive_api_schedule later in the code, we can refer to the drive_api_job job by using the drive_api_job variable that we assigned earlier. This makes the code easier to read and understand, especially if we have to refer to the job multiple times.
The cron expression "0 " means that the cron job will run at the top of every hour (i.e., when the minute value is 0). Specifically, the asterisks represent the following fields:
The first asterisk represents the minute value, which can be any value between 0 and 59.
The second asterisk represents the hour value, which can be any value between 0 and 23.
The third asterisk represents the day of the month value, which can be any value between 1 and 31.
The fourth asterisk represents the month value, which can be any value between 1 and 12.
The fifth asterisk represents the day of the week value, which can be any value between 0 and 7 (both 0 and 7 represent Sunday).
Therefore, the cron job will run at the top of every hour, every day of the month, every month of the year, and every day of the week.
Now lets head over to assets.py file and paste the following code inside the file.
import pandas as pd
#google related imports

from google.auth.transport.requests import Request
from google.oauth2.credentials import Credentials
from google.oauth2 import service_account
from google_auth_oauthlib.flow import InstalledAppFlow
from googleapiclient.discovery import build
from googleapiclient.errors import HttpError
from googleapiclient.http import MediaIoBaseDownload
from googleapiclient.http import MediaFileUpload
from dagster import asset
from github import Github
import pandas as pd
from datetime import timedelta
import nbformat
from nbconvert.preprocessors import ExecutePreprocessor
import pickle
import jupytext
from github import InputFileContent
import os
import os.path

@asset
def drive_api(context):
    SCOPES = [
    'https://www.googleapis.com/auth/spreadsheets',
    'https://www.googleapis.com/auth/drive'
    ]

    # we have to add google spreadsheets in the scope because we will be accessing data in the future from google spreadsheets api
    # dont forget to enable google spreadsheet api as well
    creds = None

    if os.path.exists("token.json"):
        creds = Credentials.from_authorized_user_file("token.json", SCOPES)

        '''look, not creds means no token.json found, therefore, creds could not be created up there
        another assumption was that maybe we created creds, but maybe token.json was not valid, so our
        cred also turned out to be not valid which is same as saying not creds.valid'''
    if not creds or not creds.valid:
        if creds and creds.expired and creds.refresh_token: #
            creds.refresh(Request())
        else:
            flow = InstalledAppFlow.from_client_secrets_file(
                "credentials.json", SCOPES
            )
            creds = flow.run_local_server(port=0)
        ''' If creds are not empty and are expired with a
            refresh token, refresh the creds '''
    # if credsnot found or not valid. at this point create a token.json file any way
        with open('token.json', 'w') as token:
            token.write(creds.to_json())
    #now it will write down all the permissions you gave using your browser ^^^

    try:
        service = build("drive", "v3", credentials=creds)
        #query = f"'{folder_id}' in parents" --this is not relevant here
        response = service.files().list(q="mimeType='application/vnd.google-apps.spreadsheet'", fields = "files(id,name,mimeType,createdTime,modifiedTime)", orderBy= "modifiedTime desc", spaces='drive').execute()
                                                                                                #spaces define where I want to search, in this case, I want to search whole of my drive
                                                                                                #https://www.notion.so/coding-in-python-for-google-api-3f338c2a0cc248ff9829f6ec3e8673b9?pvs=4#66c4563cfa9244e9a76dcec9f0e376f8
    except HttpError as e:
        print("Error: " + str(e))

    # print(response['files'])
    google_sheet_id = response['files'][0]['id']
    #print(google_sheet_id)


    try:
        # call in the google sheet api
        service = build('sheets', 'v4', credentials=creds)

        # get spreadsheet metadata, as in, titles of worksheets of the spreadsheets
        sheet_metadata = service.spreadsheets().get(spreadsheetId=google_sheet_id).execute()
        sheets = sheet_metadata.get('sheets', '') #sheets explicitly refers to sheets/worksheets/tabs

        range_id = sheets[0]['properties']['title'] # gets the title/name of the tab/sheet/worksheet in the spreadsheets

        #print(sheets[0]['properties']['title'])
        #print("printing your dataframe here")


        result = service.spreadsheets().values().get(
            spreadsheetId=google_sheet_id, range=range_id).execute() #range_id is name of sheets/tabs
        rows = result.get('values', [])
        #print(rows[0:2])

        df=pd.DataFrame(rows, columns=rows[0])

    except HttpError as e:
        print("Error: " + str(e))

    return df


@asset
def github_notebook(drive_api):
    markdown = f"""
## drive_api data

```python
import pickle
datas = pickle.loads({pickle.dumps(drive_api)!r})
```

## print all the data
```python
print(datas)
```
    """
    nb = jupytext.reads(markdown, "md")
    ExecutePreprocessor().preprocess(nb)
    return nbformat.writes(nb)

@asset(required_resource_keys={"github_api"})
def put_to_gist(context, github_notebook):
    gist=(
        context.resources.github_api # getting the variable github_api from resources of the __init__.py file
        .get_user()
        .create_gist(
        public=False,
        files={
        "google_sheets_sheet.ipynb":InputFileContent(github_notebook)
        }
        )
    )
    context.log.info(f"Notebook created at {gist.html_url}")
    return gist.html_url
This is what we are doing in this code,
We are taking the latest modified spreadsheet file from the google drive
We are visualizing the file in notebook
We are uploading the notebook into github gist.
In Dagster, the @asset decorator is used to define a specific piece of data that is used in a pipeline. This piece of data could be a file, a database table, or any other kind of data. In this case, @asset(required_resource_keys={"github_api"}) is defining an asset that requires a resource called "github_api". This likely means that the asset is related to data from the GitHub API and that the pipeline needs access to the API in order to produce or consume the asset.
Run your pipelines locally: You can run your pipelines locally using the
dagster pipeline executecommand. This command takes the name of your pipeline as an argument and executes the pipeline using the default configuration. You can also use command-line flags to override the default configuration, such as specifying a different input or output path.Run your schedules locally: You can run your schedules locally using the
dagster schedule upcommand. This command starts a scheduler process that monitors your schedule and triggers pipeline runs based on the schedule's configuration.Use Dagster Dagit: Dagster Dagit is a web-based UI for exploring, monitoring, and debugging your pipelines. You can run Dagster Dagit locally by running the
dagitcommand and visiting localhost:3000 in your web browser.
These are the basic steps for deploying a Dagster project locally. You can find more information on deploying Dagster in the Dagster documentation.